 |
| Other jewelry Kari makes |
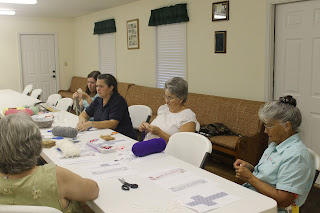
We are a group of local crafters who meet monthly to learn new crafts, explore current topics, host guest speakers, or work on "UFO's"-unfinished objects. Join us for fun, food, and fellowship.
Making Memory Wire Bracelets
One of the Kountry Krafters, Kari taught us how to make memory wire bracelets with beads. It was a fun and fairly easy project that has endless possibilities of design. You can hang charms on the end of the bracelet to dress it up even more. They make lovely accessories and gifts.
Plastic Canvas Ornaments
Reed Angels
For our July craft, we made angel ornaments from reeds. It is a great way to use scrap pieces of reed and to create a beautiful decoration at the same time. You need a big bead for the head and six inch pieces of reed. Taper the five bottom pieces and glue into the bead. Stuff a small piece of styrofoam in the bead and glue it to attach the hanger. The wings and arms are made by soaking the reed for a minute and clamping both ends to train it to curve when it dries. The songbook is made by scoring the reed down the middle with a flat screwdriver, then soaking it and gently folding in two. Clamp it until it dries, and it will form the crease of the book. The halo is made from a gold chenille stick glued on the back of the head. Color the eyes or face in with a permanent marker. The hanger is made from gold cord tied in a knot at the end and secured to the styrofoam inside the bead with a short straight pin. You could have the angel holding flowers. Just use your imagination. A simple and fun craft for the whole family. Just use caution with the hot glue!
Schrenschnitte
 |
| A 3-D Schrenschnitte |
Schrenschnitte (shear'en-schnit-tah) is a German word for scissor cuttings, the ancient craft of cutting paper into decorations. Laurie Williams taught us how to make some three-dimensional designs which are great for hanging on a Christmas tree or standing on a mantlepiece. Some can be used for greeting cards or luminaries. It is somewhat difficult to find free patterns online, but if you use your imagination, you can use create your own patterns from line or block drawings. One of the main things is to use the right kind of paper for the task. Card stock is a bit too thick to cut two images at once for the three-dimensional pieces. You should use a 65# weight paper for these. You cut the pattern in half, fold two sheets of paper in half and staple the pattern to the paper so it won't shift. You then follow the pattern to cut out the design. Then you sew the two pieces together on a sewing machine. You use the thread at the end as a hanger. Card stock is great for the free-standing pieces, and parchment works great for greeting card embellishment. You must use sharp cuticle scissors, and if there are lots of inner cuts, you should use a self-healing mat and exacto knife to make the cuts. The snowflakes you made as a child were similar to this, but for this, you use a pattern. I found an Alice in Wonderland pattern I'm getting ready to try.
 |
| Laurie shows how to sew the pieces together. |
 |
| Crafters are deep in thought on their Schrenschnitte. |
Sewing Cards
In May, we learned how to make truly unusual and exquisite greeting cards by actually sewing on the cards themselves. It is the same technique you used as a kid with the little punched sewing cards and shoelaces. But it is on a much more elaborate scale and is much more complicated to orchestrate. First you position your pattern on your cardstock and styrofoam base. Then you punch holes on the card with a sharp needle to develop your pattern and use embroidery thread to sew the designs. You can also embellish with beads or combine your design with paper punch borders. The designs here were created by Arbra Gibson from the Cane Creek Club. She shared her expertise with us, and we all made a card like this first one. We'll have to practice to be able to master these other designs.
 |
| A beaded card |
 |
| A beautiful dove with punched border |
 |
| Our state's flower with punched border |
Chicken Scratch
 |
| This is a chicken scratch flower basket Joann is making. |
 |
| A Beautiful Chicken Scratch Snowflake Pillow |
 |
| A Chicken Scratch Sailboat |
Busy Kountry Krafters
 |
| Marbelized Ornaments |
Subscribe to:
Comments (Atom)


